How to Set Up a Helpdesk Inside Microsoft Teams

Why Run Your Helpdesk Inside Teams?
Before diving into setup, it is worth understanding why this approach works so well.
- Zero context switching. Support agents handle tickets in the same app they use for everything else.
- Faster response times. Employees can submit requests in seconds via chat instead of navigating a separate portal.
- Better visibility. Managers can monitor ticket queues alongside project channels.
- Lower training overhead. No one needs to learn a new tool; Teams is already familiar.
What You Will Need
- A Microsoft Teams account (Business or Enterprise plan)
- Admin access to your Teams environment (or a willing IT admin)
- A helpdesk tool that integrates with Teams, such as Quick2Chat, Freshdesk, Zendesk, or ServiceNow
For the steps below, we use Quick2Chat as the primary example since it is purpose-built for Teams-based support.
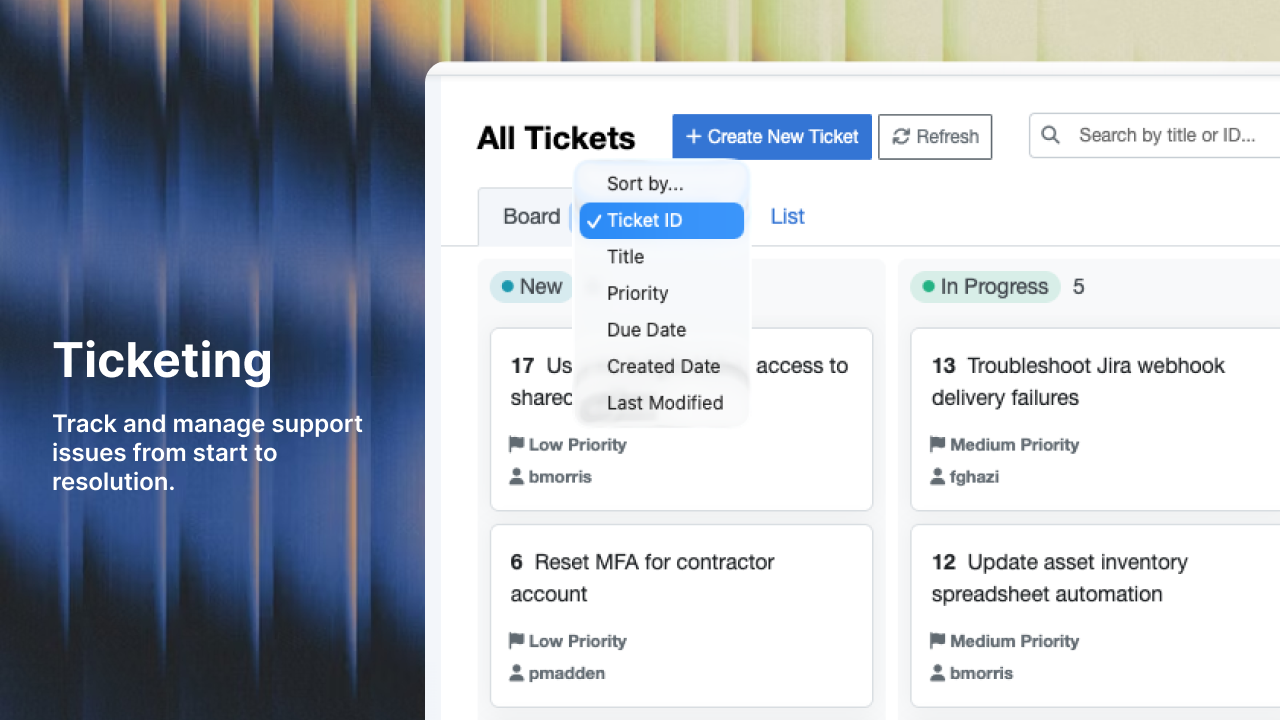
Step 1: Choose Where Tickets Will Live
Decide whether your helpdesk will be:
a) A dedicated Teams channel — Best for small teams. Requests come in via @mentions or a pinned form tab, and agents respond in threads.
b) A Teams-connected helpdesk app — Best for growing teams. A third-party tool like Quick2Chat connects directly to Teams and routes tickets automatically.
For anything beyond a handful of daily requests, option (b) will save you a significant amount of manual work.
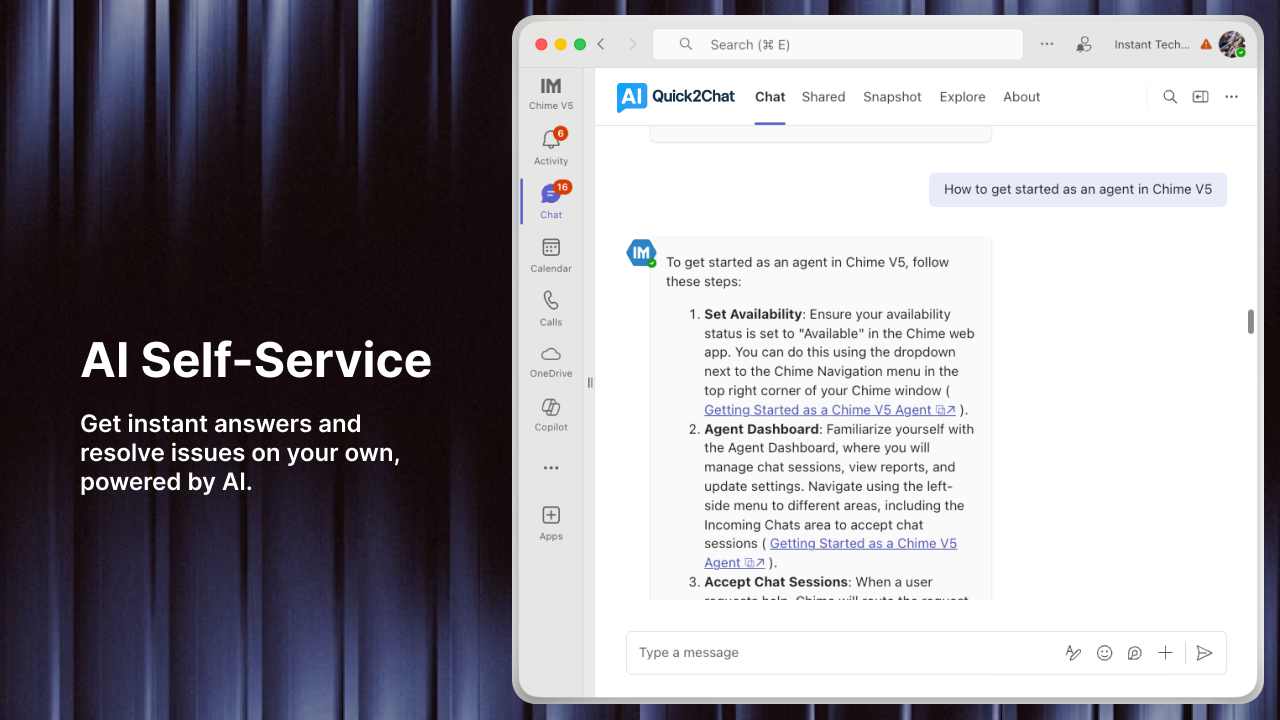
Step 2: Install Your Helpdesk App in Teams
- Open Microsoft Teams and click Apps in the left sidebar.
- Search for your helpdesk tool (e.g., "Quick2Chat") in the Teams App Store.
- Click Add and follow the authentication prompts to connect your account.
- Grant the necessary permissions so the app can read and send messages on behalf of your team.
If your organization restricts app installations, you may need your IT admin to approve the app through the Teams Admin Center under Manage apps.
Step 3: Create a Dedicated Support Channel
- In your Teams workspace, click the + button next to your channels list.
- Name the channel something clear, like #helpdesk or #IT-support.
- Set the channel privacy based on your needs. A standard channel works for most cases; a private channel is better if you want to keep ticket discussions visible only to the support team.
- Pin the helpdesk app to this channel using the + (Add a tab) button at the top of the channel.
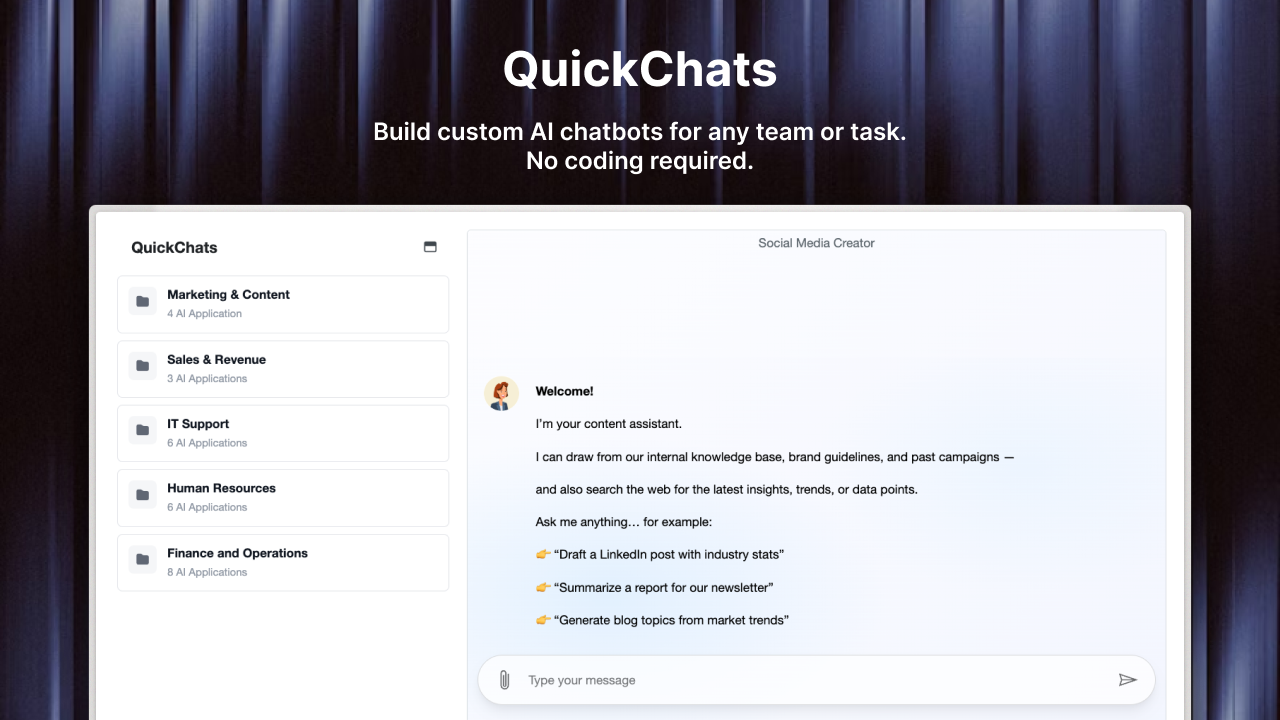
Step 4: Set Up a Ticket Submission Form
Rather than asking users to write a freeform message, give them a structured form. This ensures you collect the right information upfront and reduces back-and-forth.
With Quick2Chat, you can create a custom intake form that appears as a tab inside any Teams channel or as a bot-triggered flow. A good form captures:
- Request type (IT issue, HR question, facilities, etc.)
- Priority level (low, medium, high, urgent)
- Short description of the problem
- Any relevant attachments
Once submitted, the form automatically creates a ticket and notifies the appropriate agent or team.
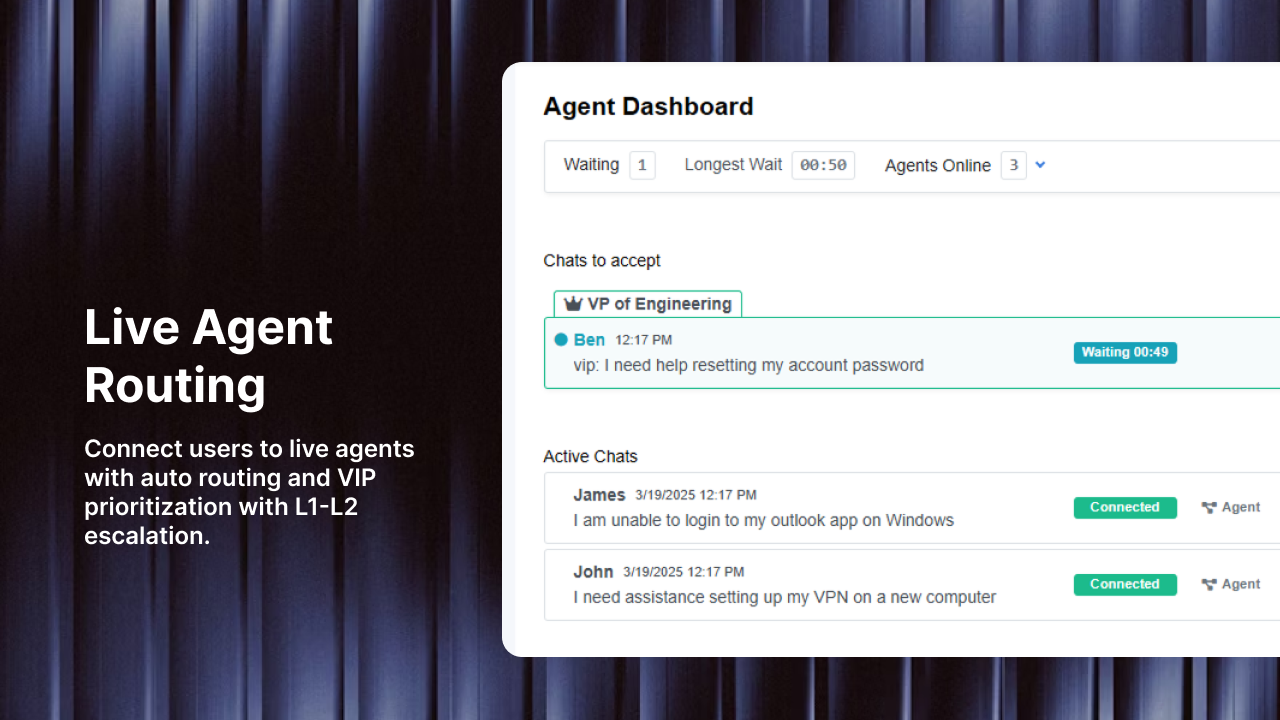
Step 5: Configure Routing and Notifications
Smart routing makes sure tickets land in the right hands without manual triage.
- In your helpdesk settings, create routing rules based on request type or keyword. For example, all tickets tagged "IT" go to the IT team channel; "HR" tickets go to the HR team.
- Set up auto-replies so users get an instant confirmation that their ticket was received.
- Configure agent notifications so that when a new ticket arrives, the right person gets a Teams message or @mention.
Step 6: Train Your Team
A tool is only as good as the people using it. Run a short walkthrough (15 to 30 minutes is usually enough) covering:
- How to view and claim incoming tickets
- How to update ticket status (open, in progress, resolved)
- How to use internal notes for team-only comments vs. public replies visible to the requester
- How to escalate tickets to a senior agent or different department
Create a short pinned message in the support channel that serves as a quick reference guide for new agents.
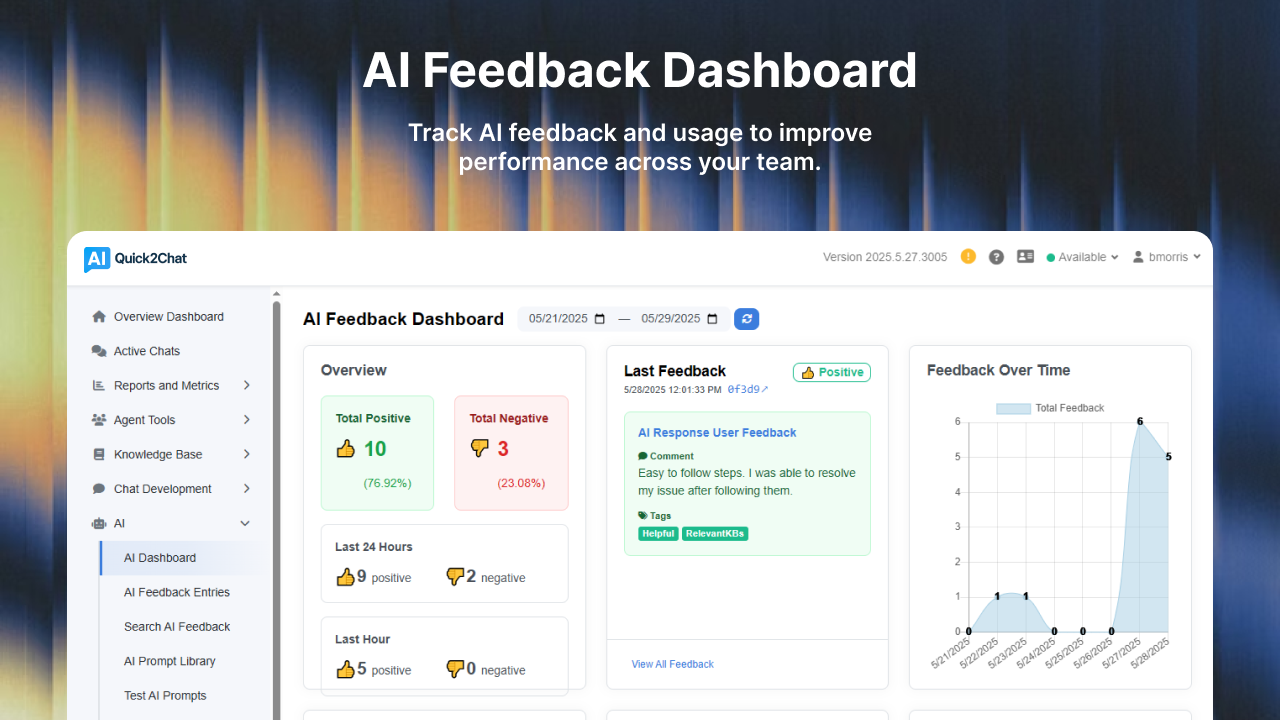
Step 7: Monitor Performance with Reports
Once your helpdesk is running, track these key metrics to spot issues early:
| Metric | What It Tells You |
|---|---|
| First response time | How quickly agents acknowledge new tickets |
| Resolution time | How long it takes to fully close a ticket |
| Ticket volume by category | Which request types are most common |
| Agent workload | Whether ticket distribution is balanced |
Most helpdesk integrations, including Quick2Chat, surface these numbers directly inside Teams via a dashboard tab or weekly summary message.
Common Mistakes to Avoid
Skipping the intake form. Without structured input, tickets lack context and agents waste time chasing basic information.
No clear ownership. If every agent can see every ticket but no one is assigned, tickets fall through the cracks. Use assignment rules or a round-robin system.
Ignoring SLAs. Set realistic response time targets and make them visible to both agents and users. This sets expectations on both sides.
Overcomplicating the channel structure. Start with one or two channels. You can always add more as volume grows.
Final Thoughts
Setting up a helpdesk inside Microsoft Teams does not require a massive implementation project. With the right tool and a clear process, you can have a working support system running in an afternoon.
The key is to meet your users and agents where they already are. When submitting a ticket feels as natural as sending a chat message, you will see faster response times, happier employees, and a support team that is not constantly firefighting.
Ready to get started? Try Quick2Chat free and see how easy it is to turn Teams into a full-featured helpdesk.